How to Build a Safe and Fun Sandpit for Toddlers in Melbourne
- Kate Westall
- Jul 11, 2025
- 5 min read

Making a secure and enjoyable playground for your toddler requires picking the ideal spot, using the right materials, including important protection features as well as adhering to regular maintenance, particularly due to the unique weather conditions in Melbourne. This guide outlines the steps to build a fun and safe sand play space in your backyard, encouraging the development of your child.
Why Sand Play Matters for Toddlers
Sand play can provide significant developmental advantages. When toddlers delve into, pour, and mold it, they build the fine motor skills needed for future tasks such as writing. The sensory feedback that sand provides from its resistance helps to improve hand muscles coordination. Beyond physical development Sandpits stimulate the imagination and help solve problems. Children explore the concept of cause and effect, learning that wet sand holds shape while dry sand flow freely, creating the foundation for a scientific approach. Social skills also thrive in this environment. The sharing of tools, the negotiation of space, and working together on structures teaches collaboration. Solo play can build confidence and independence as toddlers are immersed in their own creations.
It is a great way to build confidence through sensory exploration. Sand provides a secure, manageable environment for toddlers to play with the textures at their own speed. Beginning with a hesitant finger touch, the process can progress to full immersion, allowing children to approach new experiences with enthusiasm. Small successes, like constructing their first sandcastle, increase confidence and inspire them to tackle problems that go beyond the sandpit.
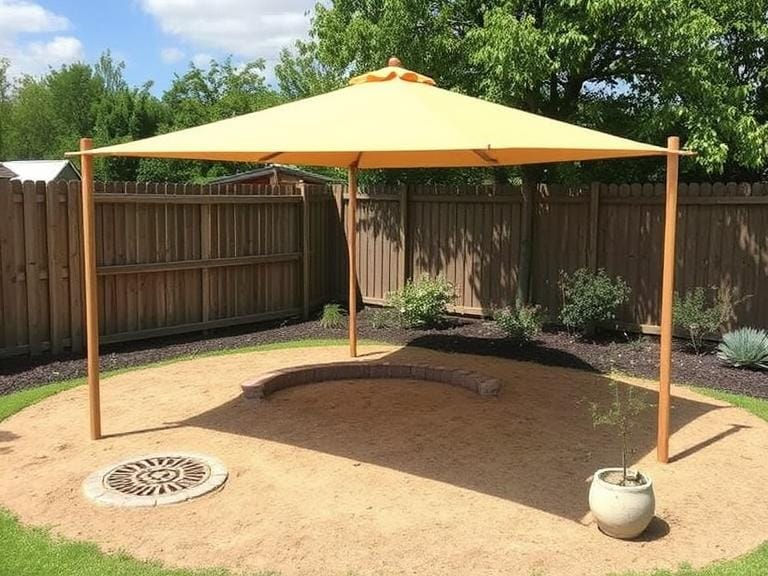
Planning Your Melbourne Sandpit
Size and Location
For just one toddler for a single toddler, an 1.2m wide x 1.2m the sandpit is spacious enough without encroaching on the garden. Give 50cm clearance around the perimeter to allow for an easy control and accessibility. If you have children and are thinking of expanding, consider expanding to 1.5m in size 1.5m. The location is crucial: pick a location with morning sunlight and shade in the afternoon to ensure that sand stays at a comfortable temperature. It should be placed near a window in the living or kitchen to make it easy to supervise, but be sure to stay away from areas that are under trees to reduce the amount of leaf debris. It should be close enough for easy access, but away from doors so that sand isn't that is tracked inside.
Budget-Friendly and Premium Options
Sandpits made from recycled materials such as tractor tyres or sleepers made of timber could cost less than $100, excluding the sand. Timber kits that are mid-range ($150-$300) come with design and amenities like built-in seating. High-end alternatives ($400-$800) consist of sturdy materials, adjustable canopy and storage that are ideal to be used over a long period of time by many children.
Safety Essentials
Depth and Structure
For toddlers younger than three ensure a sand depth of 20-30cm. This makes it easier to dig without causing any harm to children and allows them to climb independently. Be sure that walls are not any over 40cm in height and you can smooth the edges. Utilize rubber edging strips to provide additional protection from scrapes.
Hygiene and Injury Prevention
Drainage stops water from accumulation and the growth of bacteria. The base can be slopped slightly, or make holes by mesh. Make sure to use a secure covering that is gap-free to discourage cats and other debris. Set rules for sand-throwing (the primary causes of injuries to the eye) and have water available to rinse. Be sure to test the temperature of sand before playing. Spray with water on days that are hot when needed. Rake sand regularly to get rid of obstructions and to let the material aerate. Replace the sand in a timely manner.
Construction Guide
DIY Wooden Sandpit
Find your spot and dig 10cm to create a level foundation.
Lines with landscape fabric stretching it to the sides.
Create a frame with wood that has been treated (30-40cm in height). Smooth edges and secure corners using galvanised screws.
Add triangular corner seating for the ultimate in comfort.
Fill in with clean play sand.
Kits that are pre-made save time, but they need careful assembly on a level surface. Be sure that the thickness of the wood is adequate for Melbourne's harsh weather. If you are looking for a budget option, repurpose the tyre's size and cleanliness or shell of plastic - just make sure it has the drainage and stability.
Choosing Melbourne-Safe Sand
Use only "washed play sand," that is compliant with Australian security standards. Builder's sand is contaminated with dust and other additives that are unsafe for children. Calculate the volume by multiplying width x length by 0.3m thickness (e.g., 1.5m x 1.5m requires 0.675m3). Purchase from local retailers like Bunnings (bagged) and landscaping centres like Dandenong and Campbellfield (bulk). Plan to replenish each year.
Maintenance for Melbourne's Climate
Hygiene Routine
Everyday: Remove debris with an aerator.
Every week: Rake deeply to clear and test for contamination.
Each month Sprinkle sand on or lightly spray with vinegar and water mix to kill bacteria.Replace the sand every 2 to 3 years, or once a year renew your top five to 10cm.
Weather-Proofing
The fitting of a cover is not a matter of course in Melbourne. It helps prevent contamination, minimizes UV harm, and prevents the sand from accumulating water. Covers for sandpits that are specifically designed with ventilation to keep out condensation. To ensure drainage, put gravel on top of the fabric base for landscape and drill holes into pits with solid bottoms. In winter, let the air out sand during sunny days. In summer, put shade sails to ensure that temperatures are not too high.
Deterring PestsCovers with weights or elastic straps prevent cats from entering your home. Natural deterrents such as citrus peels and coffee grounds around the perimeter aid. For issues that persist, put up temporary netting or sprinklers that are activated by motion.
Toys and Long-Term Value
Toddler-Friendly Accessories
Select sturdy spades with a short handle and buckets with wide mouths. Include items with texture, such as funnels, funnels and moulds. Place your toys within mesh bags, or in waterproof bins with drainage for extending their lifespan. Change toys each month to keep curiosity. Introduce themes such as "dinosaur digs" with buried figurines or "construction sites" with toy trucks.
Extending Lifespan and Converting
With regular raking and seasonally-based maintenance, a sandpit that is maintained properly will last 5 to 10 years. Upgrade when your child is outgrowing the area or structural problems develop. Then, it can be converted to a raised garden bed for vegetables and an outdoor storage chest or a fairy-garden.
Final Thoughts
A well-designed sandpit cover can become a place of learning and fun inside the Melbourne backyard. When you prioritize safety, selecting the best materials for our climate, and ensuring the cleanliness of your sandpit, you can create an environment where children can acquire essential skills through playing. Be grateful for the sand footprints - the memories created there are worth every grain.


Comments